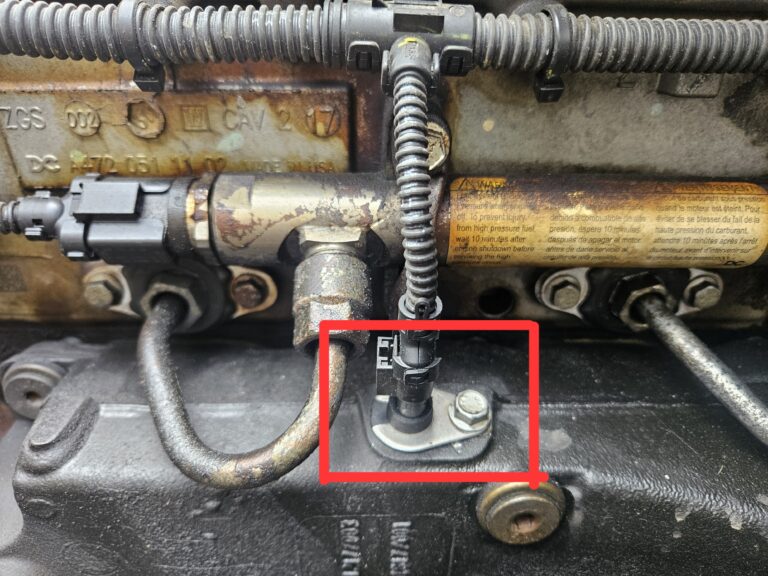
Fault Diagnosis Guide
MID 140 · PID 78 · FMI 5
Rear Drive Axle Temperature Sensor — Low Signal Fault
Model — Volvo
Warning Light — Usually stays off
Safe to Drive — Yes
Severity — Low
What This Fault Code Means
This code is about a temperature sensor on the rear-most rear axle of the truck. Its job is to keep an eye on how hot the axle gets, since axles can overheat under heavy load or long drives. The fault sets when the signal coming from this sensor drops too low or seems to disappear completely, almost as if the wire has been cut somewhere along the way.
There’s no dashboard warning tied to this one, and no change in how the truck drives. It’s a quiet fault that usually only turns up when a technician runs a scan, which is exactly why it can sit unnoticed for a while.
What Could Be Causing It
A handful of simple, mostly electrical issues tend to be behind this one:
Wiring Problems
A damaged connector or a broken wire between the sensor and the instrument cluster can easily cause the signal to drop out or go missing.
Sensor Problems
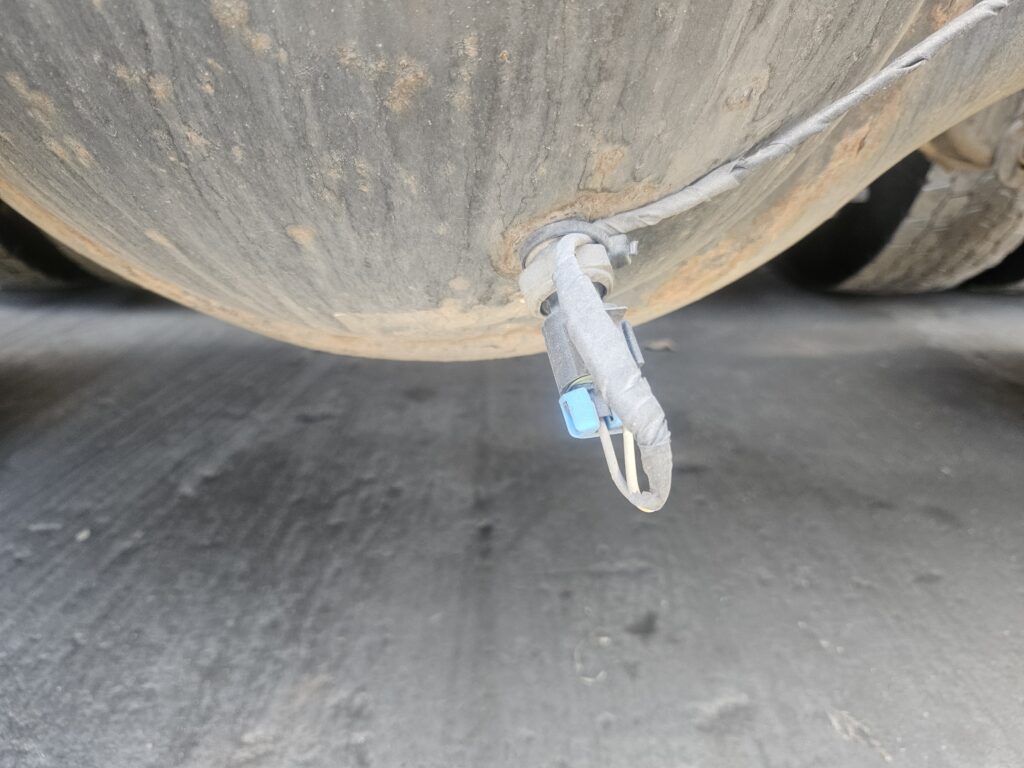
The temperature sensor mounted on the rear axle may have a damaged connector, or it could have failed internally and simply stopped sending a proper reading.
➡️ Check Other Related Code TECU P105922: Gearbox Oil Temperature Sensor Signal Too High
Instrument Cluster Connector
Sometimes the fault isn’t with the sensor at all — a damaged connector at the instrument cluster end can produce the same low-signal reading.
If the Fault Shows as Inactive
This code often appears as “inactive,” meaning it’s not happening right now, which makes it a bit trickier to chase down. Before spending time on it, a few things are worth thinking about:
- If a driver has actually complained about something related to this, it’s worth looking into properly.
- Some faults only show up while the related part is actively working, so they naturally look inactive most of the time.
- Checking how often the fault has happened and when it last occurred gives a good sense of whether it’s worth chasing.
Steps Worth Trying
- Look at the date and how many times the fault has been recorded.
- Make sure the control unit has a solid ground connection.
- Confirm the control unit is getting proper power.
- Check the connector for rust, corrosion, or visible damage.
- Gently wiggle the wiring harness while watching for the fault to reappear — this can catch a loose connection that doesn’t show up when everything is sitting still.
When the Fault Has Repaired Itself.
Sometimes the system notices that a fault hasn’t come back in a long time and marks it as self-healed. When that happens, there’s nothing that needs fixing based on that code alone. That said, the record of it stays stored in the system until someone clears it manually.
Step-by-Step: How to Track It Down
Step 1: Check the Oil Level First
Before diving into wiring and connectors, it’s worth checking the rear axle’s oil level. Low oil can sometimes affect how the axle runs and how accurately temperature is measured, so this is a quick, easy check to rule out early. Top off the oil to the correct level if it’s found low, and take note of whether there’s any sign of a leak that might explain why it dropped in the first place.
Step 2: Check the Sensor’s Connector
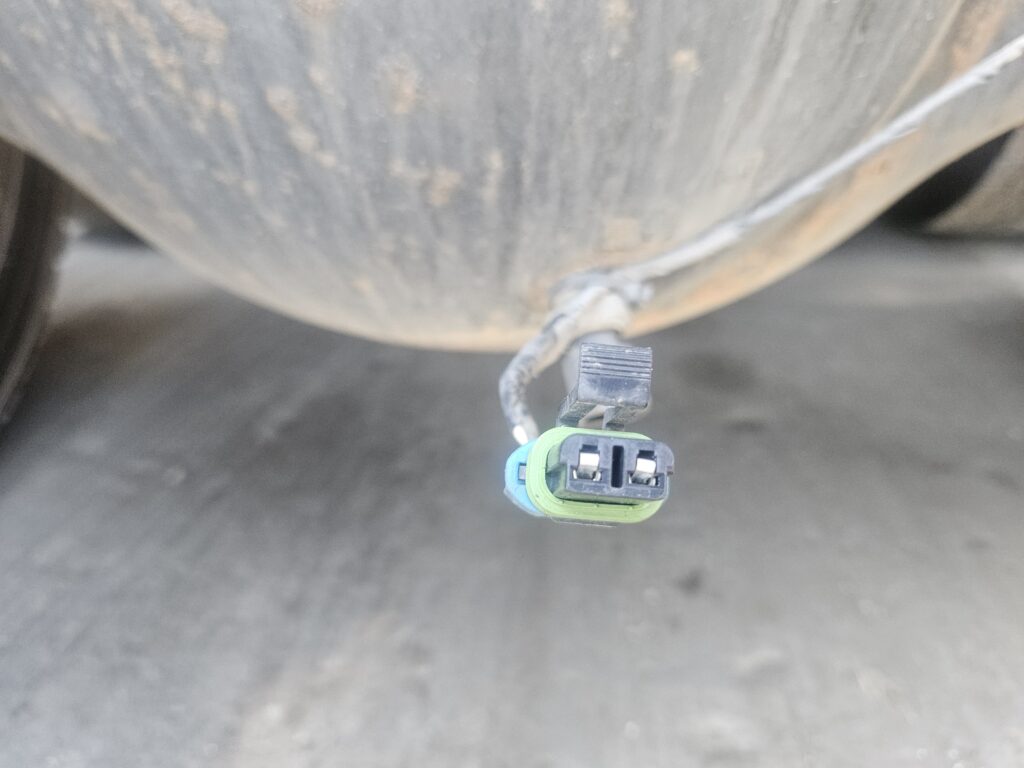
With the truck completely powered off, unplug the connector on the rear axle’s temperature sensor and take a close look at it:
- Make sure it was actually snapped in and locked properly before you removed it.
- Look for any rust or corrosion sitting on the pins.
- Confirm the pins haven’t been pushed back or loosened inside the connector.
- Check that nothing is bent or physically damaged.
Plug everything back in firmly once you’re done looking it over.
Step 3: Test the Wiring for Hidden Faults
If the fault is caused by a short or an open circuit, one common approach is to unplug the sensor and clear the fault codes, then see if the code stays cleared. If it does, that’s a strong sign the sensor itself is the problem rather than the wiring. Before touching any wires or connectors, make sure the power is completely switched off. Then check voltage supply and ground connection at the relevant connectors using the wiring diagram as a reference.
Step 4: Recheck the Fix
After making any repair, it’s worth cycling the ignition and watching whether the fault clears:
- Turn the key to OFF.
- Wait about 10 seconds.
- Turn the key back to ON.
The fault’s status refreshes on the screen roughly every 5 seconds, so you can watch in real time whether it goes away.
Why Double-Checking the Fix Matters
Once any repair step is done, it’s a good idea to double-check whether the fault has actually cleared. Sometimes just unplugging and replugging a connector during testing fixes the issue on its own, even if nothing looked obviously wrong. If that happens, it’s a decent clue that a loose connection was the real cause all along. Keep in mind some faults also need a full reset of the control unit before the system can properly confirm whether it’s fixed.
Quick Answers to Common Questions
Is it safe to keep driving with this fault?
Yes. This fault doesn’t affect how the truck drives or handles, and there’s no warning light tied to it.
Why didn’t I notice any warning light or symptom?
This fault only affects a temperature reading in the background — it doesn’t change engine performance or trigger a dashboard alert, so it typically goes unnoticed without a scan.
Should I check the axle oil even if the sensor seems fine?
Yes, it’s a good first step. Checking oil level is quick, costs nothing, and can rule out a simple cause before moving on to wiring or sensor testing.
What if the fault keeps coming back after I fix the connector?
If reseating the connector doesn’t stop it from returning, the sensor itself or the wiring harness likely needs a closer look, possibly including a wiggle test to catch a hidden loose connection.
Do I need to replace the sensor right away?
Not necessarily. Start with the simpler checks — oil level, connector condition, and wiring — since these fix the issue in many cases without needing a new part.